Home
> FAQs
> Xarxa i Wifi
> Com configuro el DNS de LaSalle
Com configuro el DNS de LaSalle
Windows 11
-
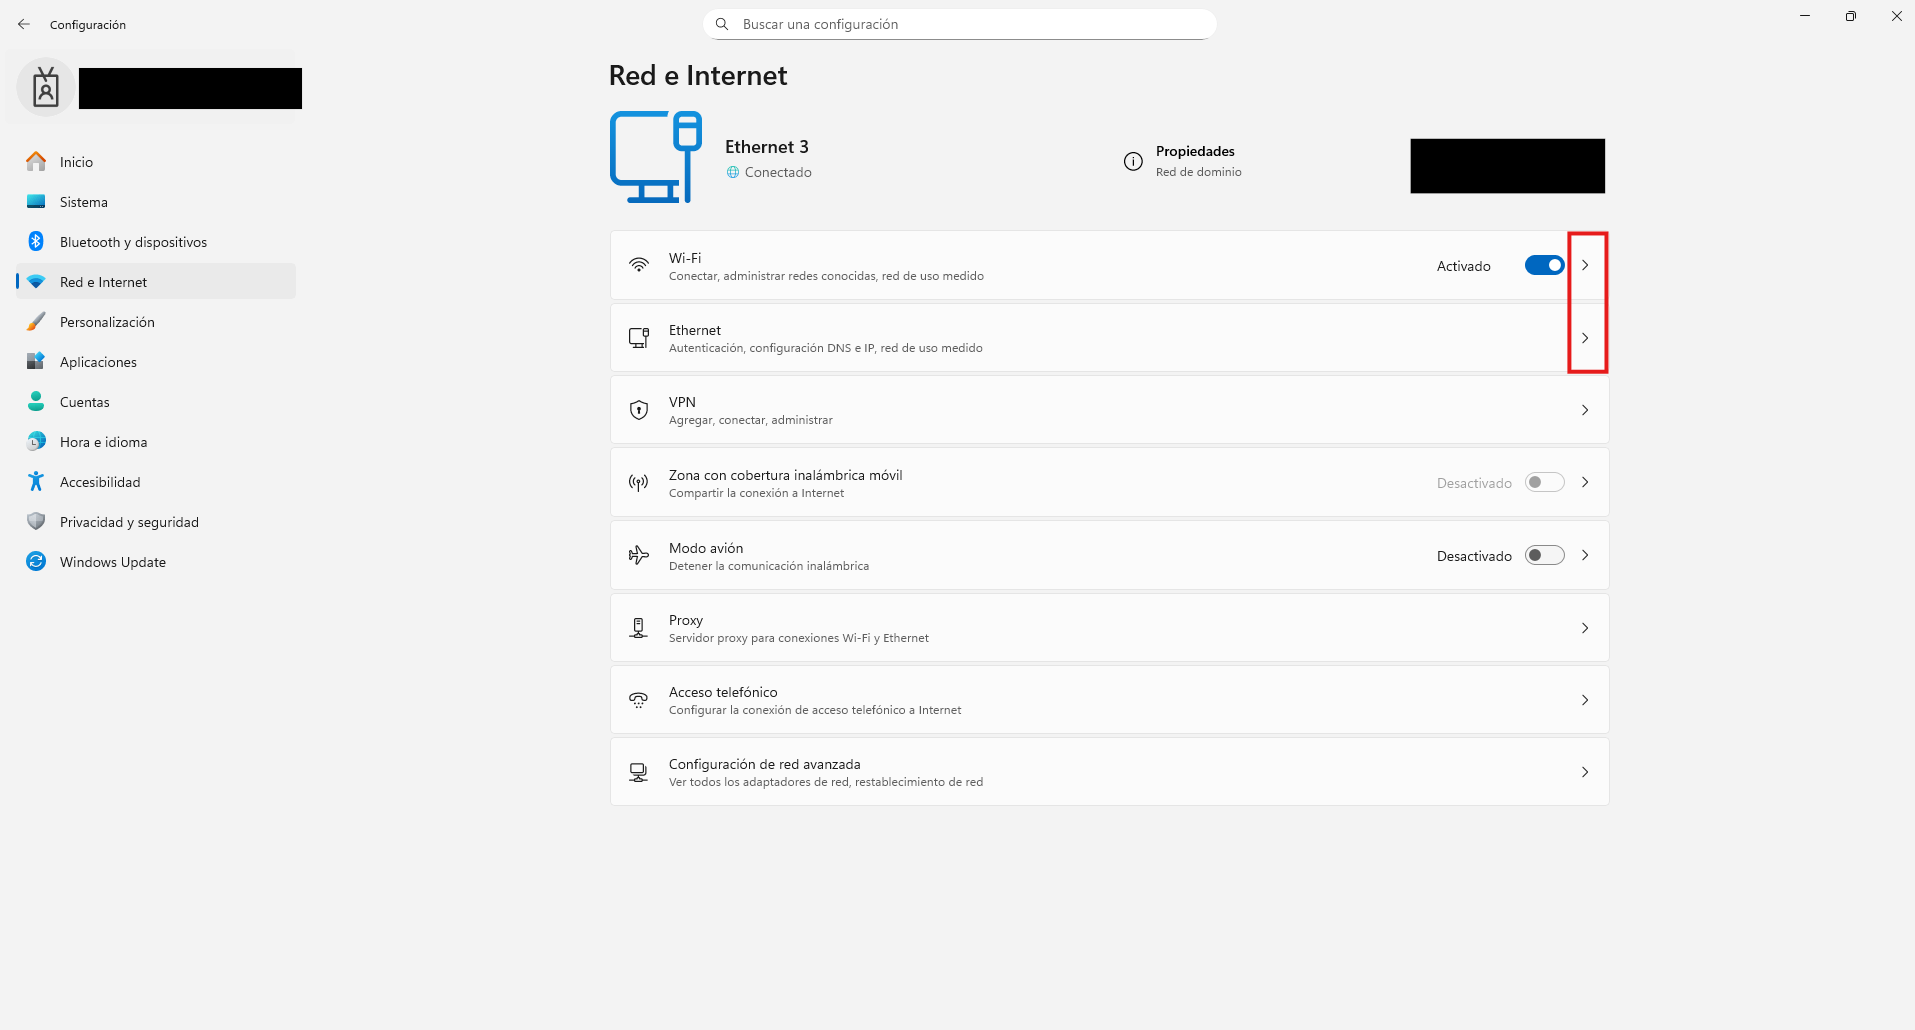
Obre la Configuració de Windows (pressionant la tecla Windows + I).
-
Al menú de l'esquerra, selecciona Xarxa i Internet.
-
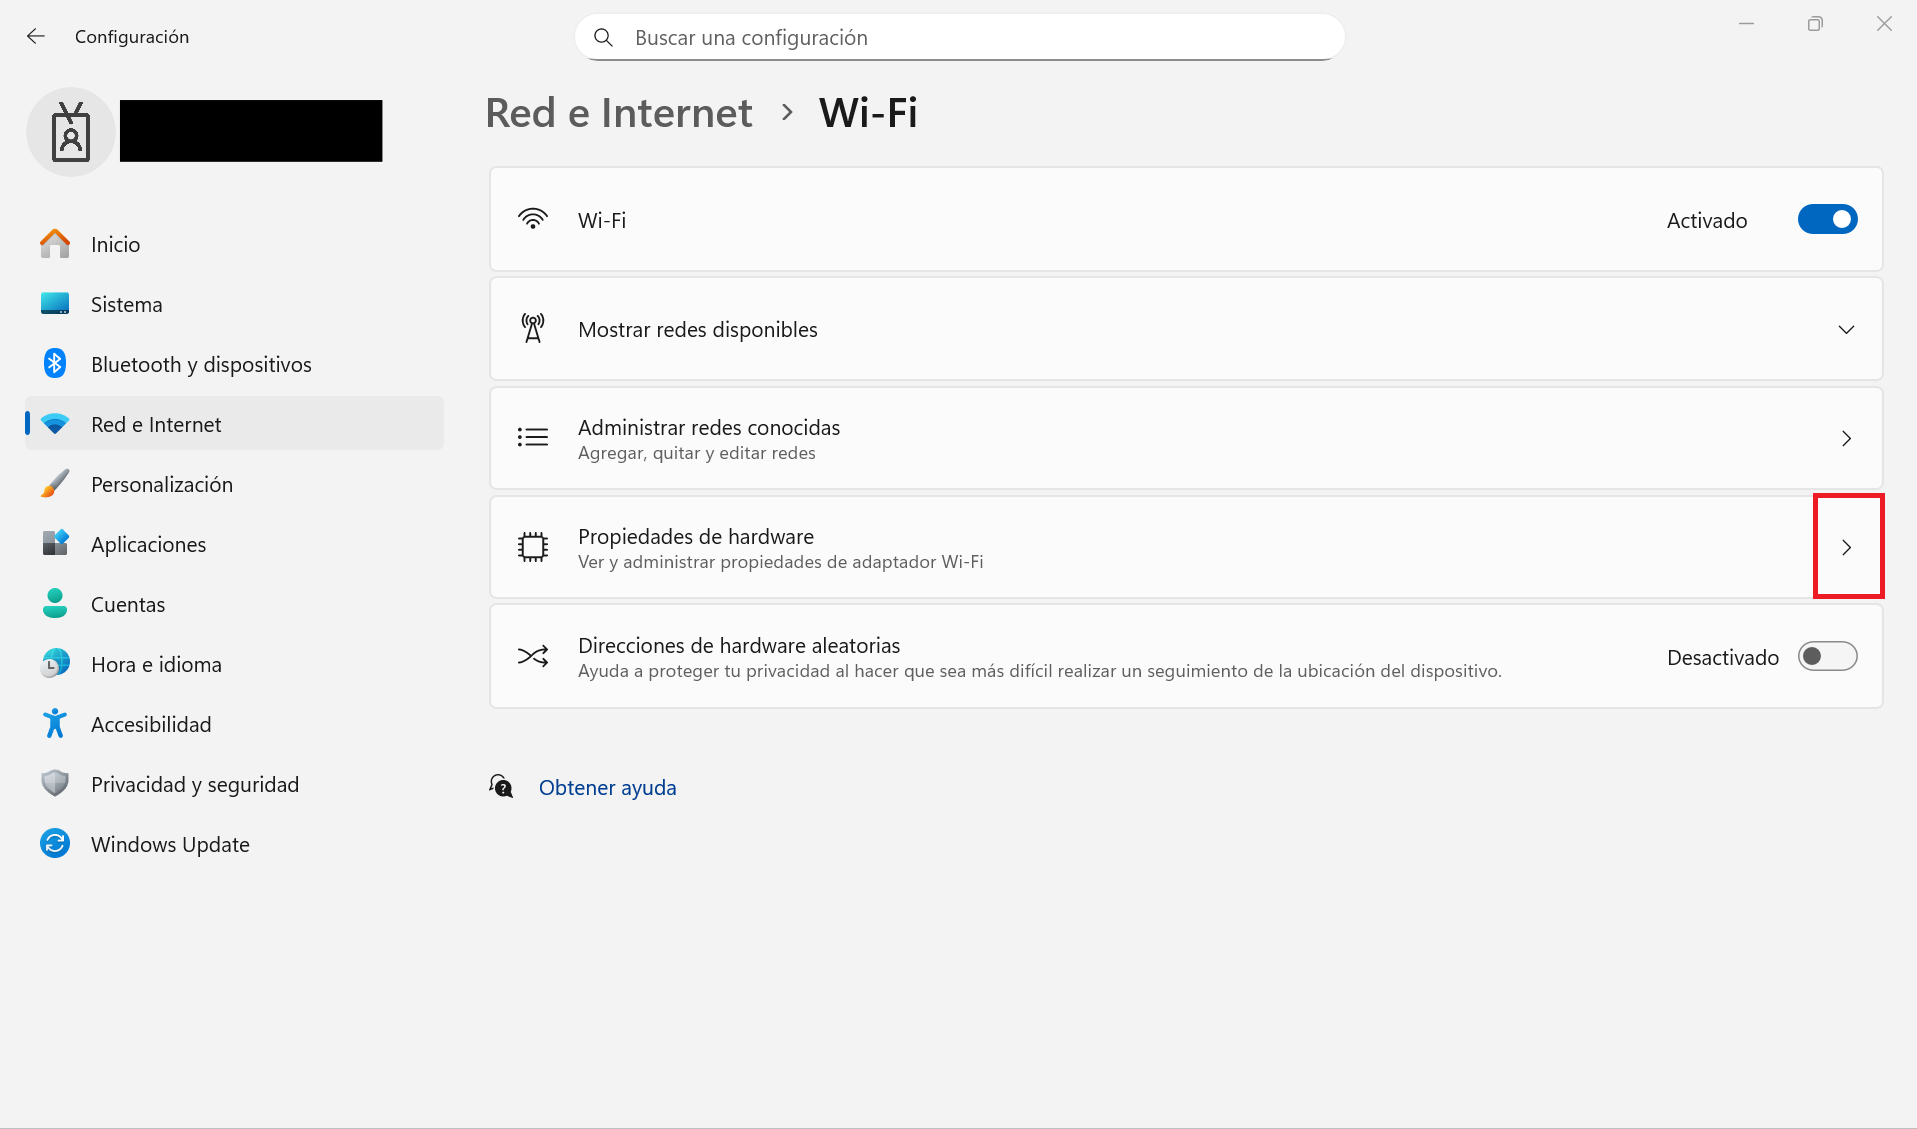
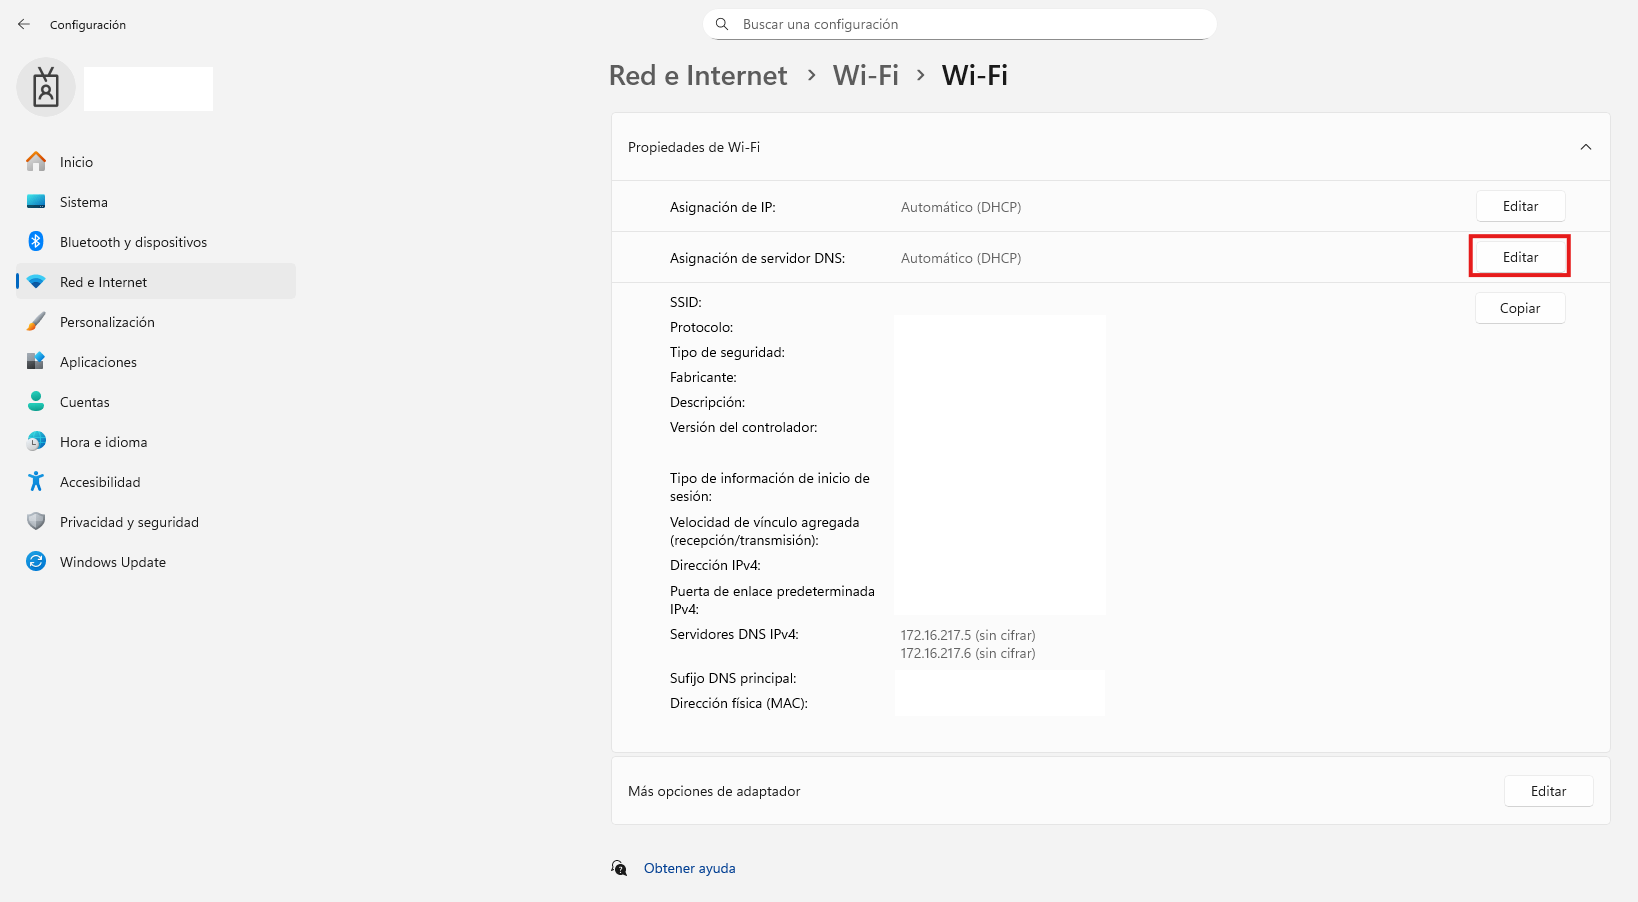
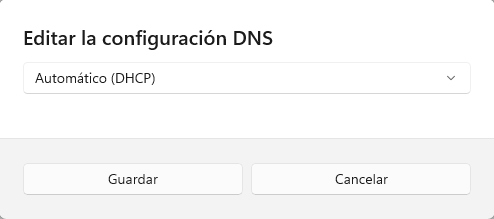
Depenent de com estiguis connectat, prem sobre Wi-Fi o Ethernet.
MacOS
-
Fes clic a la poma a la cantonada superior esquerra i selecciona Configuració del sistema.
-
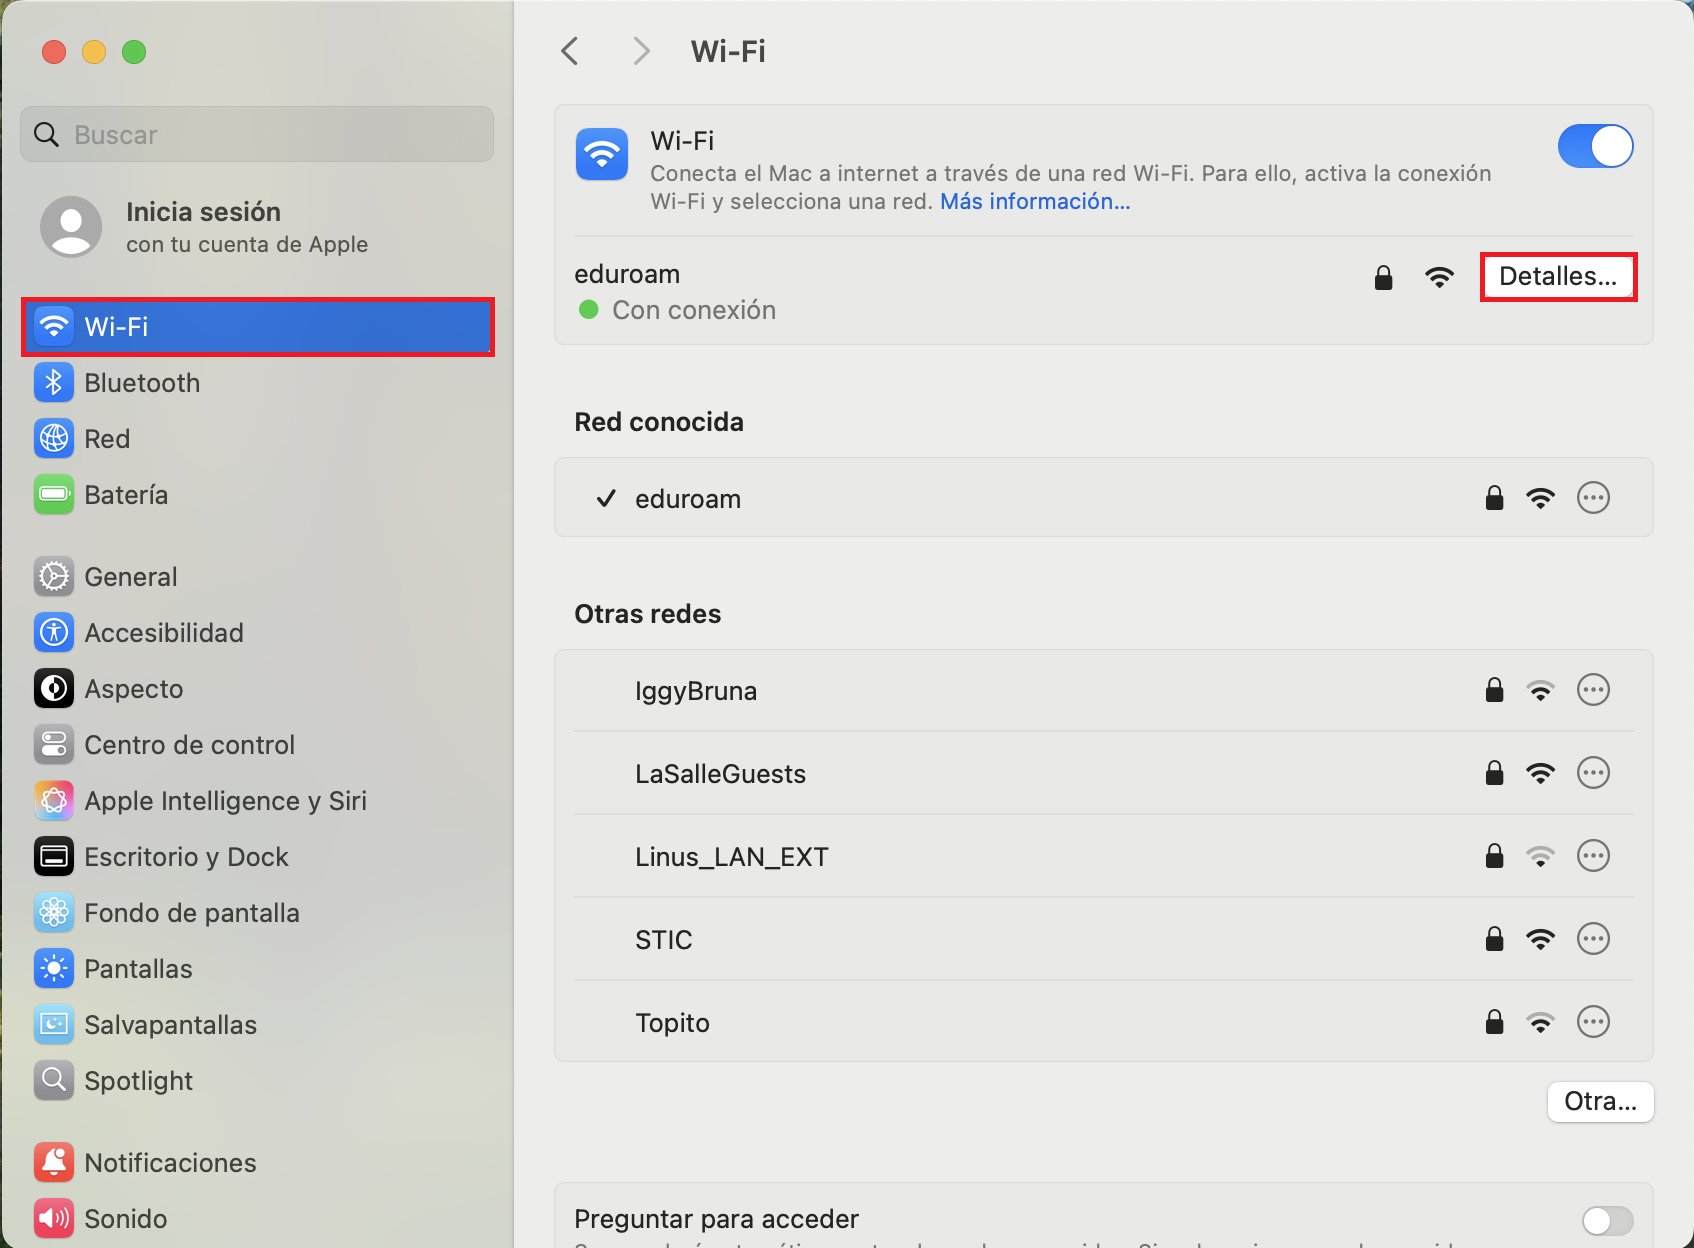
Al menú lateral, prem sobre Xarxa.
-
Fes clic sobre el tipus de connexió que estiguis fent servir (normalment Wi-Fi o Ethernet).
-
Un cop dins de la configuració de la teva xarxa, prem el botó Detalls... (sol estar a la part dreta, al costat de la xarxa connectada).
-
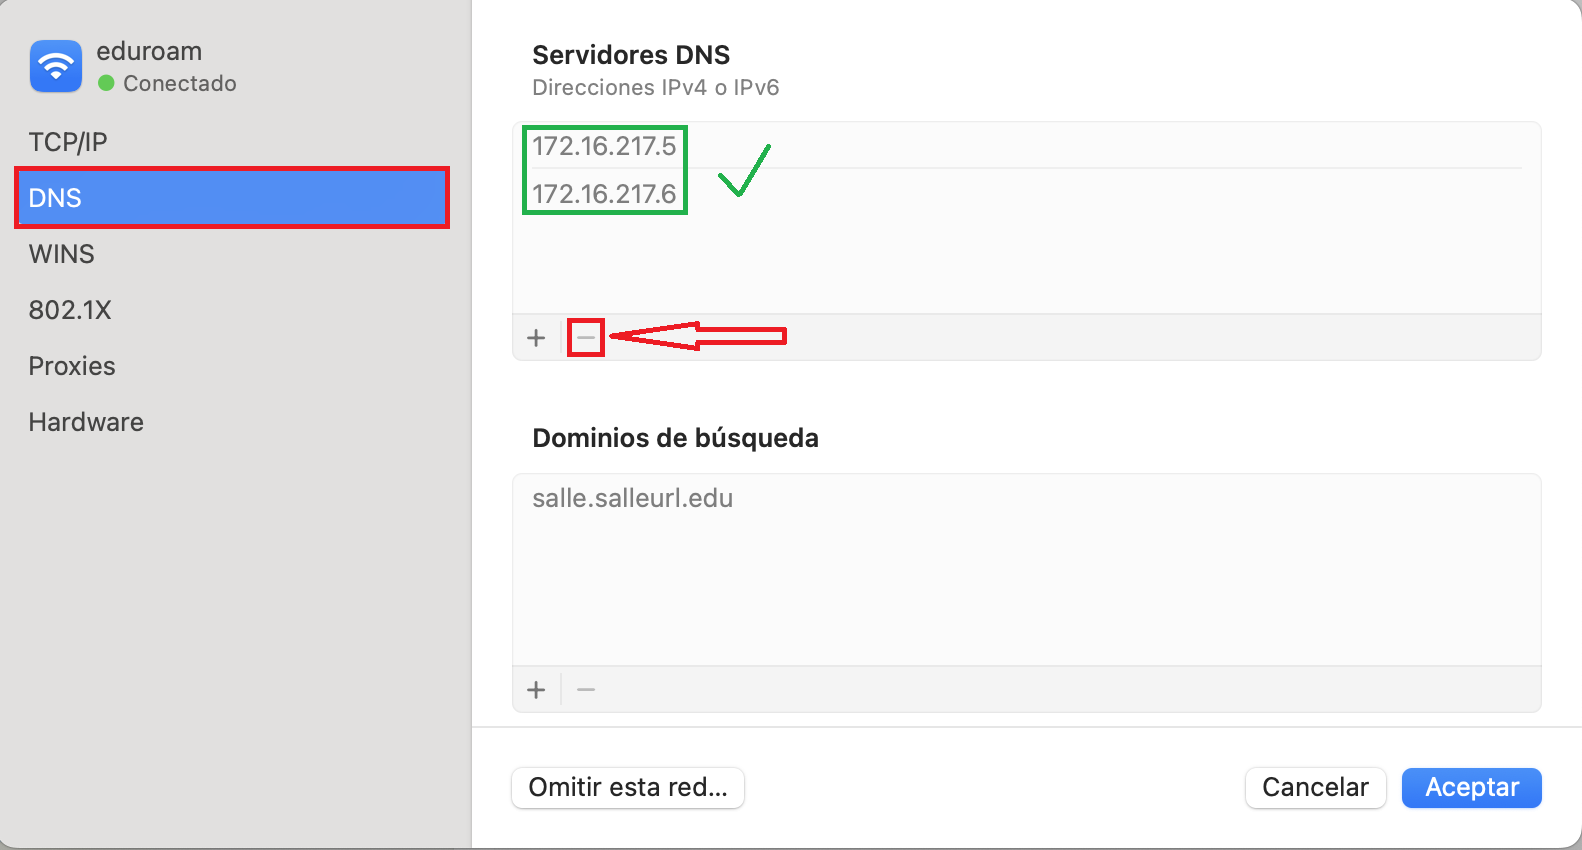
A la columna de l'esquerra de la finestra emergent, selecciona la pestanya DNS.
-
Neteja les entrades manuals: Si veus adreces IP a la llista de "Servidors DNS", selecciona-les una per una i prem el botó menys (-) que hi ha a sota.
-
Verificació: Quan hagis eliminat totes les adreces manuals, veuràs que apareixen unes adreces en color gris clar (difuminades). Això indica que macOS ja està agafant les adreces automàtiques del teu router.
-
Prem D'acord i després Aplica si és necessari.
Android
1. Configurar el Wi-Fi en mode DHCP (Automàtic)
Això farà que el teu telèfon agafi els DNS que li digui el router al qual estàs connectat.
-
Obre els Ajustos del telèfon.
-
Vés a Connexions o Xarxa i Internet.
-
Prem sobre Wi-Fi i després sobre la icona de l'engranatge o la "i" al costat de la xarxa on estàs connectat.
-
Busca l'opció Ajustos de l'IP (pot estar dins d'un menú anomenat "Avançat" o "Mostra més").
-
Assegura't que estigui seleccionat DHCP (això és l'automàtic).
2. El "DNS privat" (Molt important)
Des d'Android 9 en endavant, existeix una opció anomenada DNS privat. Si aquesta opció està configurada manualment, ignorarà el que digui el teu router. Per deixar-ho tot en automàtic "net":
-
Dins dels Ajustos, busca l'apartat Més connexions, Xarxa i Internet o simplement utilitza la lupa de cerca i escriu DNS privat.
-
Selecciona l'opció Automàtic.
-
Off/Desactivat: Farà servir el DNS del proveïdor de xarxa (el que busquem).
-
Automàtic: Android intentarà fer servir DNS xifrat si el proveïdor ho permet.
-
Nom de l'amfitrió...: Aquí és on se solen posar adreces com dns.google o 1dot1dot1dot1.cloudflare-dns.com. Assegura't que NO estigui marcada aquesta opció si vols l'automàtic pur.
Linux (Ubuntu)
Mètode 1: Interfície Gràfica (GNOME)
Aquest és el mètode més comú per a les versions d'escriptori d'Ubuntu (20.04, 22.04, 24.04).
-
Obre la Configuració (Settings) del sistema.
-
Vés a la pestanya Xarxa (Network) a la barra lateral esquerra. Si estàs amb un portàtil i fas servir Wi-Fi, selecciona Wi-Fi.
-
Clica a la icona de l'engranatge que apareix al costat de la teva xarxa connectada.
-
Es mourà a una finestra emergent; selecciona la pestanya IPv4.
-
Assegura't que el "Mètode IPv4" estigui en Automàtic (DHCP).
-
Busca l'opció DNS i posa l'interruptor en Automàtic.
-
Fes el mateix a la pestanya IPv6 si la tens activa.
-
Prem el botó Aplica.
-
Perquè els canvis siguin efectius al moment, apaga i torna a encendre l'interruptor de la xarxa.
Mètode 2: Línia de comandes (Netplan)
Si fas servir Ubuntu Server o prefereixes la terminal, Ubuntu utilitza Netplan.
-
Localitza el fitxer de configuració (el nom pot variar, però sol acabar en .yaml): ls /etc/netplan/
-
Edita el fitxer (per exemple 01-netcfg.yaml): sudo nano /etc/netplan/nom-del-fitxer.yaml
-
Assegura't que la configuració de la teva interfície (ex: eth0 o enp3s0) tingui l'opció dhcp4: true i que no hi hagi cap línia que digui nameservers. Hauria de quedar així:
network:
  version: 2
  renderer: networkd
  ethernets:
    enp3s0:
      dhcp4: true
-
Aplica els canvis: sudo netplan apply